
Cameras
Cameras capture your scene and display it to the player. Without cameras, you can't see anything in your game.
You can have an unlimited number of cameras in your scene.
In the Scene Editor, right-click and select Camera, then choose the kind of camera you want to create (perspective or orthographic).
Game Studio creates an entity with a camera component attached.
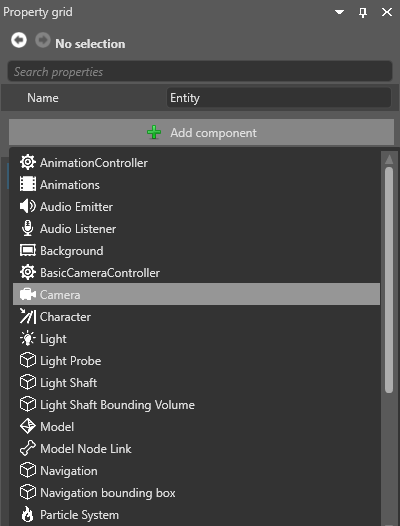
Alternatively, select the entity you want to be a camera, and in the Property Grid, click Add component and select Camera.
Camera properties
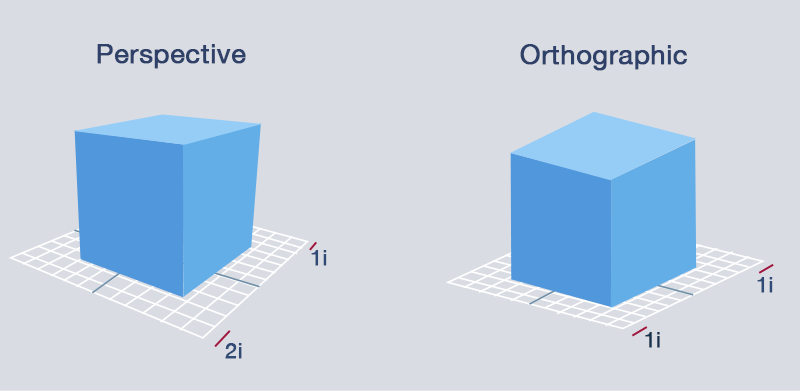
With orthographic cameras, objects are always the same size, no matter their distance from the camera. Parallel lines never touch, and there's no vanishing point. Orthographic cameras are most used for games with isometric perspectives, such as some strategy, 4X, or role-playing games.
When the camera is set to perspective mode, the field of view changes the camera frustum, and has the effect of zooming in and out of the scene. At high settings (90 and above), the field of view creates stretched "fish-eye lens" views. The default setting is 45.
When the camera is set to orthographic mode, the orthographic size has the effect of zooming in and out.
Near and far planes
The near and far planes determine where the camera's view begins and ends.
The far plane, also known as the draw distance, is the furthest point the camera can see. Objects beyond this point aren't drawn. The default setting is 1000.
Xenko renders the area between the near and far planes.
You can control cameras using camera scripts. Xenko includes three camera script templates: an FPS camera script, a side-scrolling camera script, and a basic camera controller script.
- In the Asset View (in the bottom by default), click Add asset > Scripts and choose the camera script you want to add.
In the Scene Editor, select the entity with the camera you want to control.
In the Property Grid (on the right by default), click Add component and select the camera script you want to use.
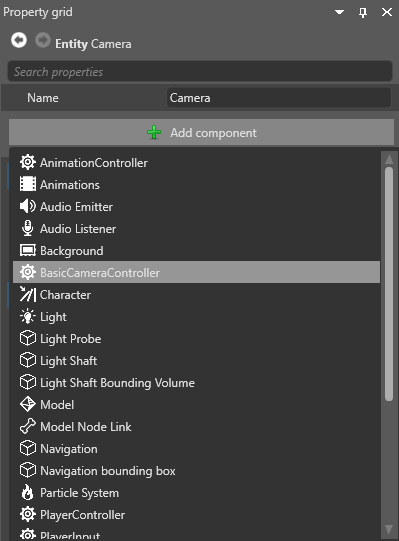
Game Studio adds the camera script to the entity.
For more information about how to create and use scripts, see .
Camera slots
Camera slots link the graphics compositor to the cameras in your scene. You bind each camera to a slot, then define which slot the compositor uses. This means you can change the or graphics compositor without having to assign new cameras each time.
You can send a camera's view to a texture and use the texture on objects in your scene. For example, you can use this to display part of your scene on a TV screen in the same scene, such as security camera footage. For more information, see Render textures.

