
Manage your app's UI resources with Resource Manager
Figure 1: The Resource Manager
- Click Add to
 add a new resource to your project. You can add image assets, vector assets, resources, or you can into your project.
 - The module dropdown lets you view resources specific to a module.
- Use the search bar to search the selected module for a resource.
- The Resource Manager manages your app's drawables, colors, and layouts. Use these tabs to switch between each resource type.
- The main content area displays previews of your resources. Right-click on a resource to see a context menu where, among other things, you can rename the resource and search your app for where the resource is used.
- Click these buttons to view your resources as either tiles or lists.
- Click these buttons to change the preview size of your resources.
In addition to the features mentioned above, the Resource Manager provides asimple way to bulk import drawables into your project. You can drag and dropyour image files—including SVG files—directly onto the Resource Manager, or youcan use the Import Drawables wizard. For more information, see theImport resources into your project section below.
Double-click on a resource to have the Resource Manager display more detailedinformation. If you have multiple versions of a resource, this detailed viewdisplays each version along with any associated qualifiers, as shown infigure 2. From here, you can also double-click on a specific version to open itin an editor window.
Figure 2: The Resource Manager showing versions of an image resource fordifferent screen densities.
You can import image resources by dragging and dropping the resource filesor folders directly onto the Resource Manager. After you drop the resources ontothe Resource Manager, the Import drawables dialog appears, where you canview the summary of the resources and add any needed qualifiers beforeimporting.
Note: For a list of supported image types, see.
- Drag and drop your images directly onto the Resource Manager window inAndroid Studio. Alternatively, you can click the plus icon(+), choose Import Drawables, as shown in figure 3, and then selectthe files and folders that you want to import.
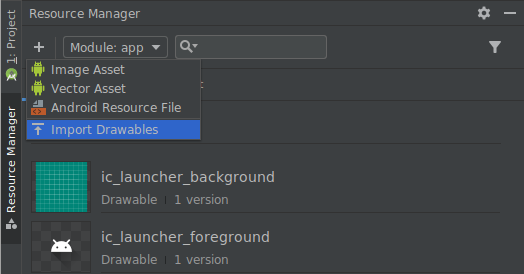
Figure 3: Select Import Drawables from the dropdown menu.
- The Import drawables dialog appears. As shown in figure 4, this dialogdisplays a list of the resources you're importing. If you're providingmultiple versions of the same resource, adddevice configuration qualifiers that describe thespecific configuration that the resource supports. For example, if you'reproviding multiple versions of the same resource for different screendensities, you can add a Density qualifier for each version. Note that iftwo or more resources have the same name and qualifiers, only one version isimported. For more information on resource qualifiers, see.
Figure 4: The Import Drawables dialog.
- When you're ready to import your resources, click the Import button.
In the Resource Manager window, your resources are now ready for you to usein your project, as shown in figure 5.
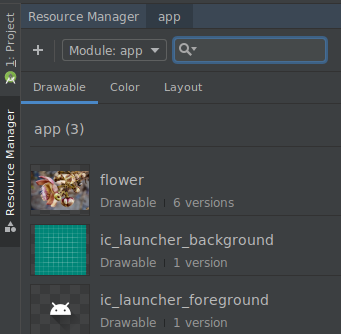
Figure 5: The Resource Manager now shows your imported images.
This table lists how different supported densities is represented for bothAndroid and iOS:
Here are some examples of how input paths translate to resource paths afterimport:
- Android density qualifier: hdpi
- Android density qualifier: xxhdpi
- Input path: /UserFolder/icon1/abc-xxhdpi/icon.pngResource path://src/main/res/drawable-xxhdpi/icon.png
- iOS scaling factor: @2x
- Input path: /UserFolder/icon1/icon@2x.pngResource path://src/main/res/drawable-xhdpi/icon.png
- iOS scaling factor: @2x
- Input path: /UserFolder/icon1/icon@2xalternate.pngResource path://src/main/res/**_drawable-xhdpi**/icon_alternate.png
For more information on supporting devices with different pixel densities, seeSupport different pixel densities.
Drag and drop drawables into your layout
You can drag and drop drawables from the Resource Manager directly onto alayout. When you drop a resource onto a layout, the Resource Manager creates acorresponding for that drawable, as shown in animation 1:
Animation 1: Dragging and dropping drawables onto a layout in Designview.
You can also drag and drop onto the XML view in the Text tab, as shown inanimation 2:
When dropping a drawable onto a layout in the Text tab, the generated codediffers depending on where you drop the layout:
- If you drop a drawable onto a blank area, the Resource Manager generates acorresponding .
- If you drop a drawable onto an existing element, the ResourceManager replaces the corresponding source attribute.

