
Pixel Perfect
Pixel Perfect is a tool built into that displays a magnified view of your app so you can inspect theposition and properties of individual pixels in your layout, and help match yourapp's layout to design mockups.
Figure 1. Android Device Monitor
- Open your project in Android Studio, build and run it on your device.
Start . Android Studio might show a Disable adb integration dialog because only one process can connect to the device via adb at once, and Android Device Monitor is requesting a connection. So click Yes.
Figure 1 illustrates what initially appears in the Android Device Monitor.In the menu bar, select Window > Open Perspective, and then click Pixel Perfect.
You should see the following three panes:
- View Object (left): This is a hierarchical list of the objects visible on the screen, including those owned by the system.When you click a view, its position is highlighted in the Pixel Perfect paneon the right.
- Pixel Perfect Loupe (center): This is the magnified screen image.It's overlaid by a grid in which each square represents one pixel. To look atthe information for a pixel, click in its square. Its color information and X/Ycoordinates appear at the bottom of the pane.
The crosshair in the pane corresponds to the positioning crosshair in the Pixel Perfect pane (on the right).
- Pixel Perfect (right): This displays the device screen.
The crosshair in this pane corresponds to the crosshair in the Loupe pane.
The view selected in the View Object pane is also outlined here in bold red. Sibling and parent views have a light red box.
The layout box may have other rectangles either inside or outside it, each of which indicates part of the view. A purple or green rectangle indicates the view bounding box. A white or black box inside the layout box represents the view padding. An outer white or black rectangle represents the margins. The padding and margin boxes are white if the layout background is black, and vice versa.
You can save a screenshot by clicking Save as PNG at the top of the window.
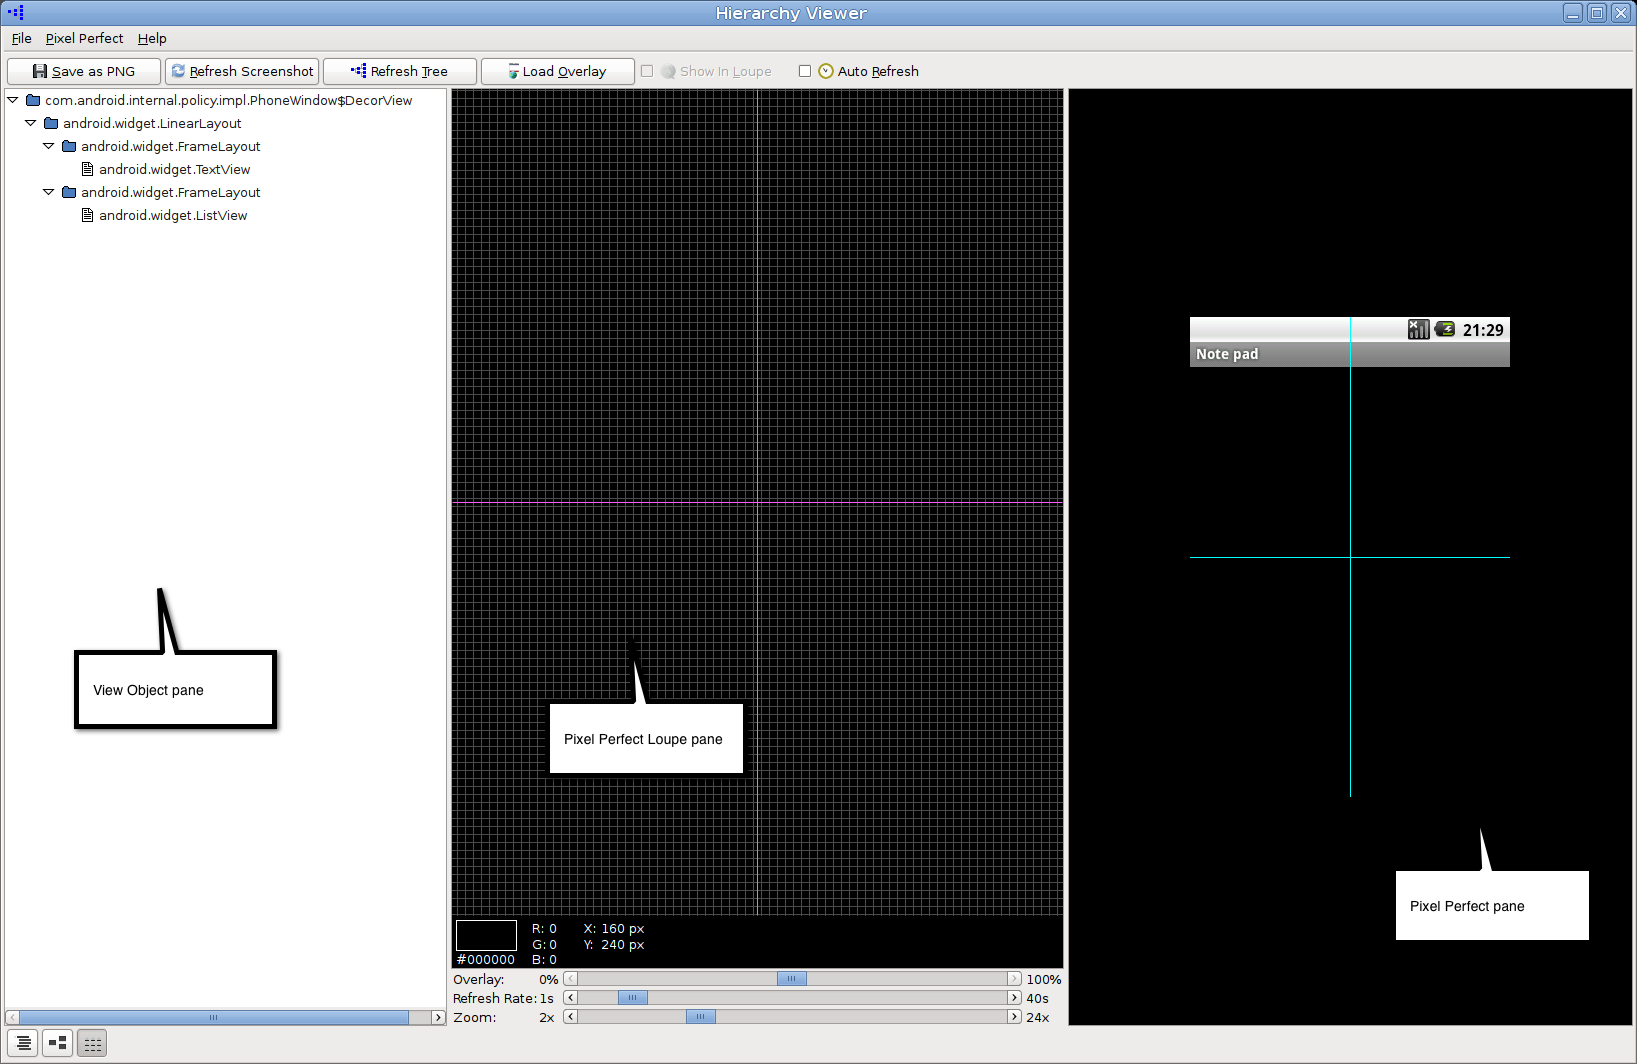
Figure 2. The Pixel Perfect window
Otherwise, you can manually refresh the Pixel Perfect pane and theLoupe pane by clicking Refresh Screenshot at the top of thewindow. You also still mightneed to refresh the View Object pane by clicking RefreshTree at the top of the window.
The PixelPerfect window helps you match up your app layout to a mockup image by allowingyou to load a bitmap as an overlay on the Pixel Perfect window.
To use a bitmap image as an overlay, follow these steps:
Pixel Perfect displays the overlay over the screen in the Pixel Perfect pane. The lower left corner of the bitmap image (X=0, Y=max value) is anchored on the lower left-most pixel (X=0, Y=max screen) of the screen.
By default, the overlay has a 50% transparency. You can adjust this with the Overlay slider at the bottom of the Loupe pane.Also by default, the overlay is not displayed in the Loupe pane. To display it, set Show in Loupe at the top of the window.

