
教你一步一步用c语言实现sift算法、下
ok,接上文,咱们一个一个的来编写main函数中所涉及到所有函数,这也是本文的关键部分:
五个步骤
ok,接下来,进入重点部分,咱们依据上文介绍的sift算法的几个步骤,来一一实现这些函数。
为了版述清晰,再贴一下,主函数,顺便再加强下对sift 算法的五个步骤的认识:
1、 SIFT算法第一步:图像预处理
CvMat *ScaleInitImage(CvMat * im) ; //金字塔初始化
2、 SIFT算法第二步:建立高斯金字塔函数
ImageOctaves* BuildGaussianOctaves(CvMat * image) ; //建立高斯金字塔
3、 SIFT算法第三步:特征点位置检测,最后确定特征点的位置
int DetectKeypoint(int numoctaves, ImageOctaves *GaussianPyr);
void ComputeGrad_DirecandMag(int numoctaves, ImageOctaves *GaussianPyr);
5、 SIFT算法第五步:抽取各个特征点处的特征描述字
void ExtractFeatureDescriptors(int numoctaves, ImageOctaves *GaussianPyr);
ok,接下来一一具体实现这几个函数:
SIFT算法第一步
SIFT算法第一步:扩大图像,预滤波剔除噪声,得到金字塔的最底层-第一阶的第一层:
{double sigma,preblur_sigma;CvMat *imMat;CvMat * dst;CvMat *tempMat;//首先对图像进行平滑滤波,抑制噪声imMat = cvCreateMat(im->rows, im->cols, CV_32FC1);BlurImage(im, imMat, INITSIGMA);//针对两种情况分别进行处理:初始化放大原始图像或者在原图像基础上进行后续操作//建立金字塔的最底层if (DOUBLE_BASE_IMAGE_SIZE){tempMat = doubleSizeImage2(imMat);//对扩大两倍的图像进行二次采样,采样率为0.5,采用线性插值#define TEMPMAT(ROW,COL) ((float *)(tempMat->data.fl + tempMat->step/sizeof(float) * (ROW)))[(COL)]dst = cvCreateMat(tempMat->rows, tempMat->cols, CV_32FC1);preblur_sigma = 1.0;//sqrt(2 - 4*INITSIGMA*INITSIGMA);BlurImage(tempMat, dst, preblur_sigma);// The initial blurring for the first image of the first octave of the pyramid.sigma = sqrt( (4*INITSIGMA*INITSIGMA) + preblur_sigma * preblur_sigma );// sigma = sqrt(SIGMA * SIGMA - INITSIGMA * INITSIGMA * 4);//printf("Init Sigma: %f/n", sigma);BlurImage(dst, tempMat, sigma); //得到金字塔的最底层-放大2倍的图像cvReleaseMat( &dst );return tempMat;}else{dst = cvCreateMat(im->rows, im->cols, CV_32FC1);//sigma = sqrt(SIGMA * SIGMA - INITSIGMA * INITSIGMA);preblur_sigma = 1.0;//sqrt(2 - 4*INITSIGMA*INITSIGMA);sigma = sqrt( (4*INITSIGMA*INITSIGMA) + preblur_sigma * preblur_sigma );//printf("Init Sigma: %f/n", sigma);BlurImage(imMat, dst, sigma); //得到金字塔的最底层:原始图像大小return dst;}}
SIFT算法第二步
SIFT第二步,建立Gaussian金字塔,给定金字塔第一阶第一层图像后,计算高斯金字塔其他尺度图像,
每一阶的数目由变量SCALESPEROCTAVE决定,给定一个基本图像,计算它的高斯金字塔图像,返回外部向量是阶梯指针,内部向量是每一个阶梯内部的不同尺度图像。
SIFT算法第三步
SIFT算法第三步,特征点位置检测,最后确定特征点的位置检测DOG金字塔中的局部最大值,找到之后,还要经过两个检验才能确认为特征点:一是它必须有明显的差异,二是他不应该是边缘点,(也就是说,在极值点处的主曲率比应该小于某一个阈值)。
//SIFT算法第三步,特征点位置检测,int DetectKeypoint(int numoctaves, ImageOctaves *GaussianPyr){//计算用于DOG极值点检测的主曲率比的阈值double curvature_threshold;curvature_threshold= ((CURVATURE_THRESHOLD + 1)*(CURVATURE_THRESHOLD + 1))/CURVATURE_THRESHOLD;#define ImLevels(OCTAVE,LEVEL,ROW,COL) ((float *)(DOGoctaves[(OCTAVE)].Octave[(LEVEL)].Level->data.fl + DOGoctaves[(OCTAVE)].Octave[(LEVEL)].Level->step/sizeof(float) *(ROW)))[(COL)]int keypoint_count = 0;for (int i=0; i<numoctaves; i++){for(int j=1;j<SCALESPEROCTAVE+1;j++)//取中间的scaleperoctave个层{//在图像的有效区域内寻找具有显著性特征的局部最大值//float sigma=(GaussianPyr[i].Octave)[j].levelsigma;//int dim = (int) (max(3.0f, 2.0*GAUSSKERN *sigma + 1.0f)*0.5);int dim = (int)(0.5*((GaussianPyr[i].Octave)[j].levelsigmalength)+0.5);for (int m=dim;m<((DOGoctaves[i].row)-dim);m++)for(int n=dim;n<((DOGoctaves[i].col)-dim);n++){if ( fabs(ImLevels(i,j,m,n))>= CONTRAST_THRESHOLD ){if ( ImLevels(i,j,m,n)!=0.0 ) //1、首先是非零{float inf_val=ImLevels(i,j,m,n);if(( (inf_val <= ImLevels(i,j-1,m-1,n-1))&&(inf_val <= ImLevels(i,j-1,m ,n-1))&&(inf_val <= ImLevels(i,j-1,m+1,n-1))&&(inf_val <= ImLevels(i,j-1,m-1,n ))&&(inf_val <= ImLevels(i,j-1,m ,n ))&&(inf_val <= ImLevels(i,j-1,m+1,n ))&&(inf_val <= ImLevels(i,j-1,m-1,n+1))&&(inf_val <= ImLevels(i,j-1,m ,n+1))&&(inf_val <= ImLevels(i,j-1,m+1,n+1))&& //底层的小尺度9(inf_val <= ImLevels(i,j,m-1,n-1))&&(inf_val <= ImLevels(i,j,m ,n-1))&&(inf_val <= ImLevels(i,j,m+1,n-1))&&(inf_val <= ImLevels(i,j,m-1,n ))&&(inf_val <= ImLevels(i,j,m+1,n ))&&(inf_val <= ImLevels(i,j,m-1,n+1))&&(inf_val <= ImLevels(i,j,m ,n+1))&&(inf_val <= ImLevels(i,j,m+1,n+1))&& //当前层8(inf_val <= ImLevels(i,j+1,m-1,n-1))&&(inf_val <= ImLevels(i,j+1,m ,n-1))&&(inf_val <= ImLevels(i,j+1,m+1,n-1))&&(inf_val <= ImLevels(i,j+1,m-1,n ))&&(inf_val <= ImLevels(i,j+1,m ,n ))&&(inf_val <= ImLevels(i,j+1,m+1,n ))&&(inf_val <= ImLevels(i,j+1,m-1,n+1))&&(inf_val <= ImLevels(i,j+1,m ,n+1))&&(inf_val <= ImLevels(i,j+1,m+1,n+1)) //下一层大尺度9) ||( (inf_val >= ImLevels(i,j-1,m-1,n-1))&&(inf_val >= ImLevels(i,j-1,m ,n-1))&&(inf_val >= ImLevels(i,j-1,m+1,n-1))&&(inf_val >= ImLevels(i,j-1,m-1,n ))&&(inf_val >= ImLevels(i,j-1,m ,n ))&&(inf_val >= ImLevels(i,j-1,m+1,n ))&&(inf_val >= ImLevels(i,j-1,m-1,n+1))&&(inf_val >= ImLevels(i,j-1,m ,n+1))&&(inf_val >= ImLevels(i,j-1,m+1,n+1))&&(inf_val >= ImLevels(i,j,m-1,n-1))&&(inf_val >= ImLevels(i,j,m ,n-1))&&(inf_val >= ImLevels(i,j,m+1,n-1))&&(inf_val >= ImLevels(i,j,m-1,n ))&&(inf_val >= ImLevels(i,j,m+1,n ))&&(inf_val >= ImLevels(i,j,m-1,n+1))&&(inf_val >= ImLevels(i,j,m ,n+1))&&(inf_val >= ImLevels(i,j,m+1,n+1))&&(inf_val >= ImLevels(i,j+1,m-1,n-1))&&(inf_val >= ImLevels(i,j+1,m ,n-1))&&(inf_val >= ImLevels(i,j+1,m+1,n-1))&&(inf_val >= ImLevels(i,j+1,m-1,n ))&&(inf_val >= ImLevels(i,j+1,m ,n ))&&(inf_val >= ImLevels(i,j+1,m+1,n ))&&(inf_val >= ImLevels(i,j+1,m-1,n+1))&&(inf_val >= ImLevels(i,j+1,m ,n+1))&&(inf_val >= ImLevels(i,j+1,m+1,n+1))) ) //2、满足26个中极值点{//此处可存储//然后必须具有明显的显著性,即必须大于CONTRAST_THRESHOLD=0.02if ( fabs(ImLevels(i,j,m,n))>= CONTRAST_THRESHOLD ){//最后显著处的特征点必须具有足够的曲率比,CURVATURE_THRESHOLD=10.0,首先计算Hessian矩阵// Compute the entries of the Hessian matrix at the extrema location./*1 0 -10 0 0-1 0 1 *0.25*/// Compute the trace and the determinant of the Hessian.//Det_H = Dxx*Dyy - Dxy^2;float Dxx,Dyy,Dxy,Tr_H,Det_H,curvature_ratio;Dxx = ImLevels(i,j,m,n-1) + ImLevels(i,j,m,n+1)-2.0*ImLevels(i,j,m,n);Dyy = ImLevels(i,j,m-1,n) + ImLevels(i,j,m+1,n)-2.0*ImLevels(i,j,m,n);Tr_H = Dxx + Dyy;Det_H = Dxx*Dyy - Dxy*Dxy;// Compute the ratio of the principal curvatures.curvature_ratio = (1.0*Tr_H*Tr_H)/Det_H;if ( (Det_H>=0.0) && (curvature_ratio <= curvature_threshold) ) //最后得到最具有显著性特征的特征点{//将其存储起来,以计算后面的特征描述字keypoint_count++;Keypoint k;/* Allocate memory for the keypoint. */k = (Keypoint) malloc(sizeof(struct KeypointSt));k->next = keypoints;keypoints = k;k->row = m*(GaussianPyr[i].subsample);k->col =n*(GaussianPyr[i].subsample);k->sy = m; //行k->sx = n; //列k->octave=i;k->level=j;k->scale = (GaussianPyr[i].Octave)[j].absolute_sigma;}//if >curvature_thresh}//if >contrast}//if inf value}//if non zero}//if >contrast} //for concrete image level col}//for levels}//for octavesreturn keypoint_count;}//在图像中,显示SIFT特征点的位置void DisplayKeypointLocation(IplImage* image, ImageOctaves *GaussianPyr){Keypoint p = keypoints; // p指向第一个结点while(p) // 没到表尾{cvLine( image, cvPoint((int)((p->col)-3),(int)(p->row)),cvPoint((int)((p->col)+3),(int)(p->row)), CV_RGB(255,255,0),1, 8, 0 );cvLine( image, cvPoint((int)(p->col),(int)((p->row)-3)),cvPoint((int)(p->col),(int)((p->row)+3)), CV_RGB(255,255,0),1, 8, 0 );// cvCircle(image,cvPoint((uchar)(p->col),(uchar)(p->row)),// (int)((GaussianPyr[p->octave].Octave)[p->level].absolute_sigma),// CV_RGB(255,0,0),1,8,0);p=p->next;}}// Compute the gradient direction and magnitude of the gaussian pyramid imagesvoid ComputeGrad_DirecandMag(int numoctaves, ImageOctaves *GaussianPyr){// ImageOctaves *mag_thresh ;mag_pyr=(ImageOctaves*) malloc( numoctaves * sizeof(ImageOctaves) );grad_pyr=(ImageOctaves*) malloc( numoctaves * sizeof(ImageOctaves) );// float sigma=( (GaussianPyr[0].Octave)[SCALESPEROCTAVE+2].absolute_sigma ) / GaussianPyr[0].subsample;// int dim = (int) (max(3.0f, 2 * GAUSSKERN *sigma + 1.0f)*0.5+0.5);#define ImLevels(OCTAVE,LEVEL,ROW,COL) ((float *)(GaussianPyr[(OCTAVE)].Octave[(LEVEL)].Level->data.fl + GaussianPyr[(OCTAVE)].Octave[(LEVEL)].Level->step/sizeof(float) *(ROW)))[(COL)]for (int i=0; i<numoctaves; i++){mag_pyr[i].Octave= (ImageLevels*) malloc( (SCALESPEROCTAVE) * sizeof(ImageLevels) );grad_pyr[i].Octave= (ImageLevels*) malloc( (SCALESPEROCTAVE) * sizeof(ImageLevels) );for(int j=1;j<SCALESPEROCTAVE+1;j++)//取中间的scaleperoctave个层{CvMat *Mag = cvCreateMat(GaussianPyr[i].row, GaussianPyr[i].col, CV_32FC1);CvMat *Ori = cvCreateMat(GaussianPyr[i].row, GaussianPyr[i].col, CV_32FC1);CvMat *tempMat1 = cvCreateMat(GaussianPyr[i].row, GaussianPyr[i].col, CV_32FC1);CvMat *tempMat2 = cvCreateMat(GaussianPyr[i].row, GaussianPyr[i].col, CV_32FC1);cvZero(Mag);cvZero(Ori);cvZero(tempMat1);cvZero(tempMat2);#define MAG(ROW,COL) ((float *)(Mag->data.fl + Mag->step/sizeof(float) *(ROW)))[(COL)]#define ORI(ROW,COL) ((float *)(Ori->data.fl + Ori->step/sizeof(float) *(ROW)))[(COL)]#define TEMPMAT1(ROW,COL) ((float *)(tempMat1->data.fl + tempMat1->step/sizeof(float) *(ROW)))[(COL)]#define TEMPMAT2(ROW,COL) ((float *)(tempMat2->data.fl + tempMat2->step/sizeof(float) *(ROW)))[(COL)]for (int m=1;m<(GaussianPyr[i].row-1);m++)for(int n=1;n<(GaussianPyr[i].col-1);n++){//计算幅值TEMPMAT1(m,n) = 0.5*( ImLevels(i,j,m,n+1)-ImLevels(i,j,m,n-1) ); //dxTEMPMAT2(m,n) = 0.5*( ImLevels(i,j,m+1,n)-ImLevels(i,j,m-1,n) ); //dyMAG(m,n) = sqrt(TEMPMAT1(m,n)*TEMPMAT1(m,n)+TEMPMAT2(m,n)*TEMPMAT2(m,n)); //mag//计算方向ORI(m,n) =atan( TEMPMAT2(m,n)/TEMPMAT1(m,n) );if (ORI(m,n)==CV_PI)ORI(m,n)=-CV_PI;}((mag_pyr[i].Octave)[j-1]).Level=Mag;((grad_pyr[i].Octave)[j-1]).Level=Ori;cvReleaseMat(&tempMat1);cvReleaseMat(&tempMat2);}//for levels}//for octaves}
SIFT算法第四步
SIFT算法第五步
SIFT算法第五步:抽取各个特征点处的特征描述字,确定特征点的描述字。描述字是Patch网格内梯度方向的描述,旋转网格到主方向,插值得到网格处梯度值。
一个特征点可以用228=32维的向量,也可以用448=128维的向量更精确的进行描述。
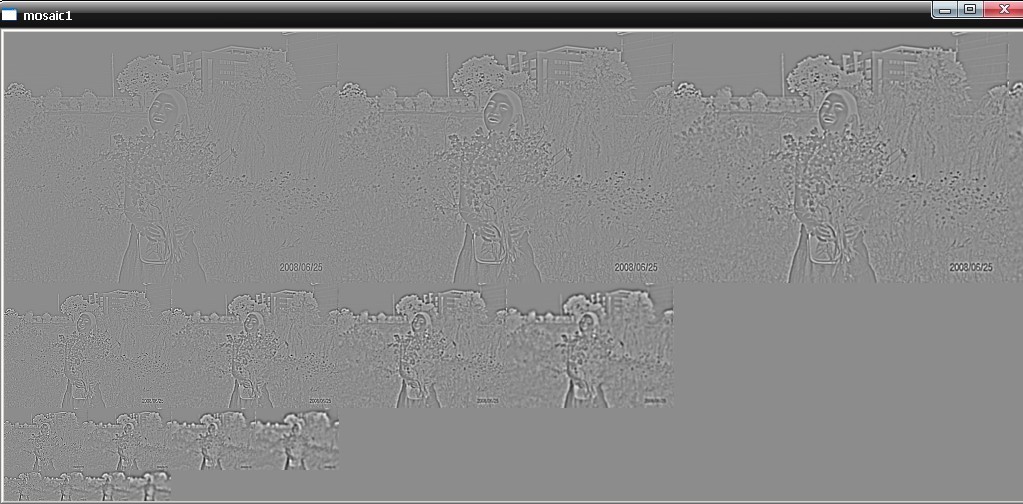
void ExtractFeatureDescriptors(int numoctaves, ImageOctaves *GaussianPyr){// The orientation histograms have 8 binsfloat orient_bin_spacing = PI/4;float orient_angles[8]={-PI,-PI+orient_bin_spacing,-PI*0.5, -orient_bin_spacing,0.0, orient_bin_spacing, PI*0.5, PI+orient_bin_spacing};//产生描述字中心各点坐标float *feat_grid=(float *) malloc( 2*16 * sizeof(float));for (int i=0;i<GridSpacing;i++){for (int j=0;j<2*GridSpacing;++j,++j){feat_grid[i*2*GridSpacing+j]=-6.0+i*GridSpacing;feat_grid[i*2*GridSpacing+j+1]=-6.0+0.5*j*GridSpacing;}}//产生网格float *feat_samples=(float *) malloc( 2*256 * sizeof(float));for ( i=0;i<4*GridSpacing;i++){for (int j=0;j<8*GridSpacing;j+=2){feat_samples[i*8*GridSpacing+j]=-(2*GridSpacing-0.5)+i;feat_samples[i*8*GridSpacing+j+1]=-(2*GridSpacing-0.5)+0.5*j;}}float feat_window = 2*GridSpacing;Keypoint p = keyDescriptors; // p指向第一个结点while(p) // 没到表尾{float scale=(GaussianPyr[p->octave].Octave)[p->level].absolute_sigma;float sine = sin(p->ori);float cosine = cos(p->ori);//计算中心点坐标旋转之后的位置float *featcenter=(float *) malloc( 2*16 * sizeof(float));for (int i=0;i<GridSpacing;i++){for (int j=0;j<2*GridSpacing;j+=2){float x=feat_grid[i*2*GridSpacing+j];featcenter[i*2*GridSpacing+j]=((cosine * x + sine * y) + p->sx);}}// calculate sample window coordinates (rotated along keypoint)float *feat=(float *) malloc( 2*256 * sizeof(float));for ( i=0;i<64*GridSpacing;i++,i++){float x=feat_samples[i];float y=feat_samples[i+1];feat[i]=((cosine * x + sine * y) + p->sx);feat[i+1]=((-sine * x + cosine * y) + p->sy);}//Initialize the feature descriptor.float *feat_desc = (float *) malloc( 128 * sizeof(float));for (i=0;i<128;i++){feat_desc[i]=0.0;// printf("%f ",feat_desc[i]);}//printf("/n");for ( i=0;i<512;++i,++i){float x_sample = feat[i];float y_sample = feat[i+1];// Interpolate the gradient at the sample position/*0 1 01 * 10 1 0 具体插值策略如图示*/float sample12=getPixelBI(((GaussianPyr[p->octave].Octave)[p->level]).Level, x_sample, y_sample-1);float sample21=getPixelBI(((GaussianPyr[p->octave].Octave)[p->level]).Level, x_sample-1, y_sample);float sample22=getPixelBI(((GaussianPyr[p->octave].Octave)[p->level]).Level, x_sample, y_sample);float sample23=getPixelBI(((GaussianPyr[p->octave].Octave)[p->level]).Level, x_sample+1, y_sample);float sample32=getPixelBI(((GaussianPyr[p->octave].Octave)[p->level]).Level, x_sample, y_sample+1);//float diff_x = 0.5*(sample23 - sample21);//float diff_y = 0.5*(sample32 - sample12);float diff_x = sample23 - sample21;float diff_y = sample32 - sample12;float mag_sample = sqrt( diff_x*diff_x + diff_y*diff_y );float grad_sample = atan( diff_y / diff_x );if(grad_sample == CV_PI)grad_sample = -CV_PI;// Compute the weighting for the x and y dimensions.float *x_wght=(float *) malloc( GridSpacing * GridSpacing * sizeof(float));float *y_wght=(float *) malloc( GridSpacing * GridSpacing * sizeof(float));float *pos_wght=(float *) malloc( 8*GridSpacing * GridSpacing * sizeof(float));;for (int m=0;m<32;++m,++m){float x=featcenter[m];float y=featcenter[m+1];x_wght[m/2] = max(1 - (fabs(x - x_sample)*1.0/GridSpacing), 0);y_wght[m/2] = max(1 - (fabs(y - y_sample)*1.0/GridSpacing), 0);}for ( m=0;m<16;++m)for (int n=0;n<8;++n)pos_wght[m*8+n]=x_wght[m]*y_wght[m];free(x_wght);free(y_wght);//计算方向的加权,首先旋转梯度场到主方向,然后计算差异float diff[8],orient_wght[128];for ( m=0;m<8;++m){float angle = grad_sample-(p->ori)-orient_angles[m]+CV_PI;float temp = angle / (2.0 * CV_PI);angle -= (int)(temp) * (2.0 * CV_PI);diff[m]= angle - CV_PI;}// Compute the gaussian weighting.float x=p->sx;float y=p->sy;float g = exp(-((x_sample-x)*(x_sample-x)+(y_sample-y)*(y_sample-y))/(2*feat_window*feat_window))/(2*CV_PI*feat_window*feat_window);for ( m=0;m<128;++m){orient_wght[m] = max((1.0 - 1.0*fabs(diff[m%8])/orient_bin_spacing),0);feat_desc[m] = feat_desc[m] + orient_wght[m]*pos_wght[m]*g*mag_sample;}free(pos_wght);}free(feat);free(featcenter);float norm=GetVecNorm( feat_desc, 128);for (int m=0;m<128;m++){feat_desc[m]/=norm;if (feat_desc[m]>0.2)feat_desc[m]=0.2;}norm=GetVecNorm( feat_desc, 128);for ( m=0;m<128;m++){feat_desc[m]/=norm;printf("%f ",feat_desc[m]);}printf("/n");p->descrip = feat_desc;p=p->next;}free(feat_grid);free(feat_samples);}//为了显示图象金字塔,而作的图像水平拼接CvMat* MosaicHorizen( CvMat* im1, CvMat* im2 ){int row,col;CvMat *mosaic = cvCreateMat( max(im1->rows,im2->rows),(im1->cols+im2->cols),CV_32FC1);#define Mosaic(ROW,COL) ((float*)(mosaic->data.fl + mosaic->step/sizeof(float)*(ROW)))[(COL)]#define Im11Mat(ROW,COL) ((float *)(im1->data.fl + im1->step/sizeof(float) *(ROW)))[(COL)]#define Im22Mat(ROW,COL) ((float *)(im2->data.fl + im2->step/sizeof(float) *(ROW)))[(COL)]cvZero(mosaic);/* Copy images into mosaic1. */for ( row = 0; row < im1->rows; row++)for ( col = 0; col < im1->cols; col++)Mosaic(row,col)=Im11Mat(row,col) ;for ( row = 0; row < im2->rows; row++)for ( col = 0; col < im2->cols; col++)Mosaic(row, (col+im1->cols) )= Im22Mat(row,col) ;return mosaic;}//为了显示图象金字塔,而作的图像垂直拼接CvMat* MosaicVertical( CvMat* im1, CvMat* im2 ){int row,col;CvMat *mosaic = cvCreateMat(im1->rows+im2->rows,max(im1->cols,im2->cols), CV_32FC1);#define Mosaic(ROW,COL) ((float*)(mosaic->data.fl + mosaic->step/sizeof(float)*(ROW)))[(COL)]#define Im11Mat(ROW,COL) ((float *)(im1->data.fl + im1->step/sizeof(float) *(ROW)))[(COL)]#define Im22Mat(ROW,COL) ((float *)(im2->data.fl + im2->step/sizeof(float) *(ROW)))[(COL)]cvZero(mosaic);/* Copy images into mosaic1. */for ( row = 0; row < im1->rows; row++)for ( col = 0; col < im1->cols; col++)Mosaic(row,col)= Im11Mat(row,col) ;for ( row = 0; row < im2->rows; row++)for ( col = 0; col < im2->cols; col++)Mosaic((row+im1->rows),col)=Im22Mat(row,col) ;
最后,再看一下,运行效果(图中美女为老乡+朋友,何姐08年照):
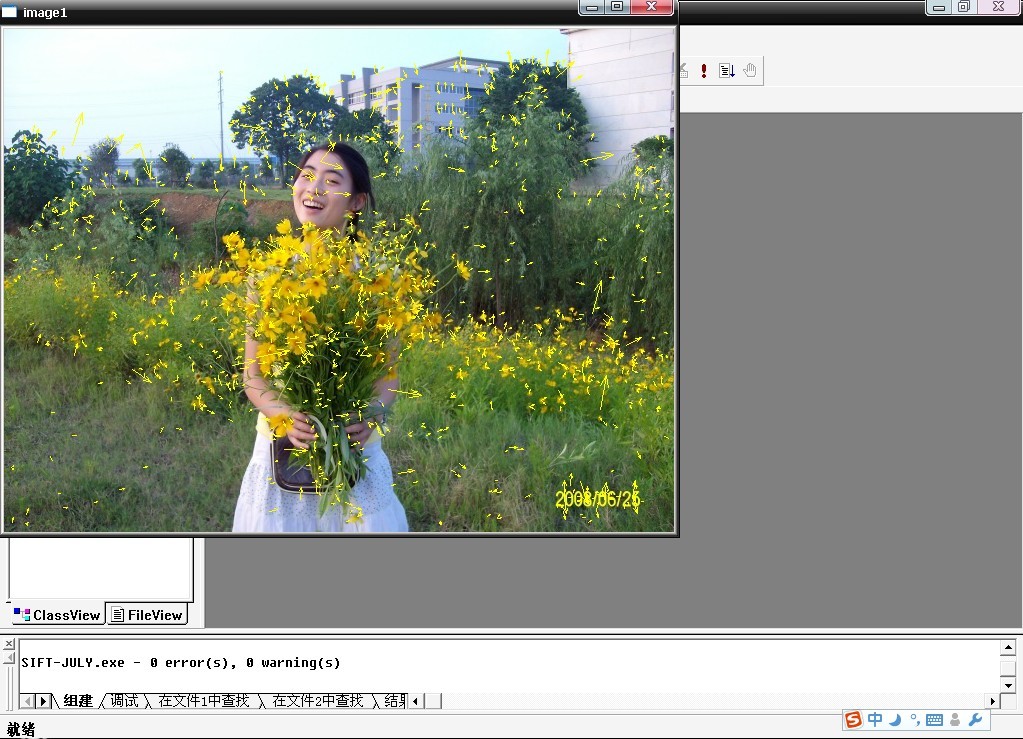
完。
updated
有很多朋友都在本文评论下要求要本程序的完整源码包(注:本文代码未贴全,复制粘贴编译肯定诸多错误),但由于时隔太久,这份代码我自己也找不到了,不过,我可以提供一份sift + KD + BBF,且可以编译正确的代码供大家参考学习,有pudn帐号的朋友可以前去下载:(没有pudn账号的同学请加群:169056165,验证信息:sift,至群共享下载),然后用两幅不同的图片做了下匹配(当然,运行结果显示是不匹配的),效果还不错:http://weibo.com/1580904460/yDmzAEwcV#1348475194313! July、二零一二年十月十一日。

