
Configure GitHub
We will cover creating and configuring a GitHub App for webhooks and events and then a GitHub OAuth app for logging in to OpenFaaS Cloud with your GitHub Account.
Click on Profile -> Settings -> Developer Settings
Click GitHub Apps and New GitHub App
Enter your details
Fill out "GitHub App Name", "Webhook URL" and leave the secret blank for now.
Example webhook URL:
Checks: Read & Write
Commit Statuses: Read & Write
Repository contents: Read-only
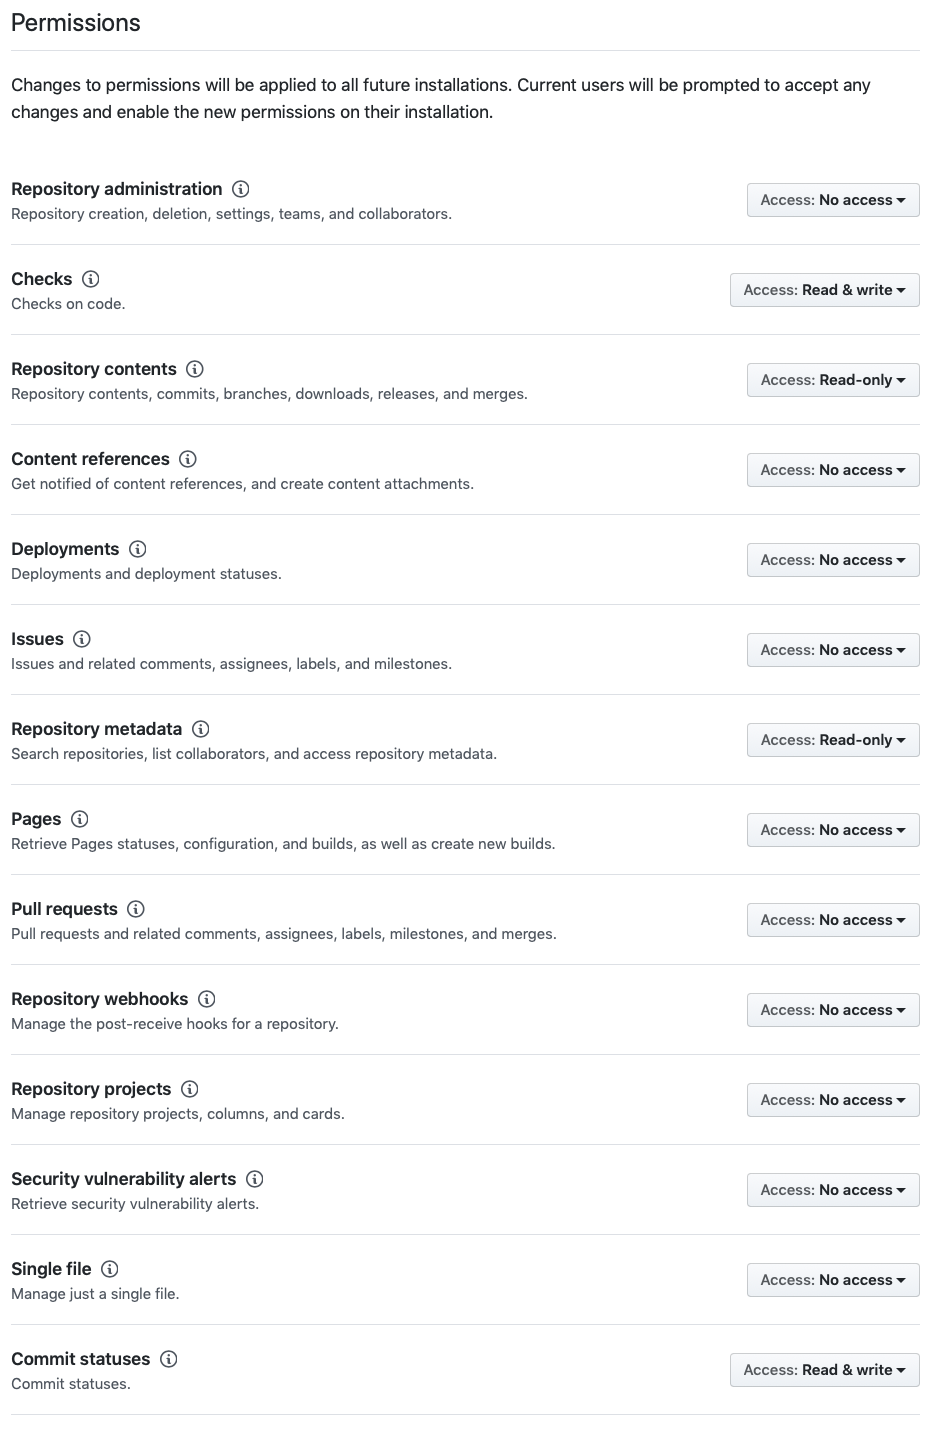
No User permissions are required
- Set the app to be installed on Any account
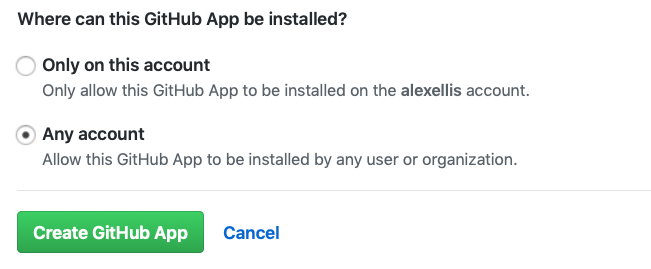
Finally click Create GitHub App
Navigate to your App's page on GitHub
Click "Generate a private key". A file will be downloaded, rename it to
private-key.pemand place it in .
Take a note of the URL for your "Public Page", you will need to share this with your users
Install your App
Click Install App, then navigate to one of your GitHub repos or organisations and install the App onto selected repositories.
- Diagostics
At any point you can return to this page and click "Advanced" here you can expand the requests and responses of all webhooks generated by your App.
It is highly recommended to enable authentication through OAuth. To set it up follow the steps in the next section. If you have decided not to configure OAuth then you can finish here.
Create a GitHub OAuth integration (optional)
We will now create a GitHub OAuth integration so that we and our users can log into OpenFaaS Cloud using our GitHub account.
Click on Profile -> Settings -> Developer Settings
Click OAuth Apps and New OAuth App
Fill out the form
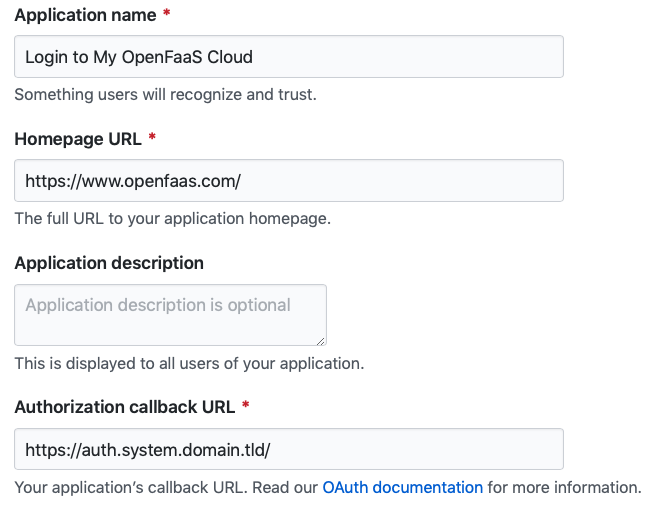
Set the Application Name as Login to My OpenFaaS Cloud
Set the Homepage URL to
Set your Authorization URL to where domain.tld is the domain name you are using for OpenFaaS Cloud
Collect your and
client_secret
That's it, you can now input this data into the ofc-bootstrap 1-click tool, or follow the developer instructions in the repo.

