
创建一个基于 CMS 的博客
我们将会使用 Vue.js 快速构建一个基于 CMS 的博客站。它使用了 ,一个 API 优先的 CMS,让你使用 ButterCMS 仪表盘管理内容并将我们的内容 API 集成到你的 Vue.js 应用中。你可以为一个新的项目或在一个已有的 Vue.js 项目使用 ButterCMS。
在你的命令行中运行:
Butter 也可以通过 CDN 加载:
快速开始
设置你的 API token:
var butter = require('buttercms')('your_api_token');
使用 ES6:
使用 CDN:
<script src="https://cdnjs.buttercms.com/buttercms-1.1.0.min.js"></script><script>var butter = Butter('your_api_token');</script>
将这个文件导入到任何你想使用 ButterCMS 的组件中。然后在浏览器的命令行中运行:
butter.post.list({page: 1, page_size: 10}).then(function(response) {console.log(response)})
为了展示博文,我们在应用中创建了一个 /blog 路由 (使用 Vue Router) 并从 Butter API 获取博文列表,同样的还创建了一个 /blog/:slug 路由来处理单篇博文。
你可以翻阅 ButterCMS API 参考文档 来了解更多选项,比如按分类或作者过滤。请求的响应也会包含一些用在翻页导航上的元数据。
router/index.js:
然后创建 components/BlogHome.vue 作为你的博客首页,列出你最近的博文。
<script>import { butter } from '@/buttercms'export default {name: 'blog-home',data() {return {page_title: 'Blog',posts: []}methods: {getPosts() {butter.post.list({page: 1,}).then(res => {this.posts = res.data.data})}},created() {this.getPosts()}}</script><template><div id="blog-home"><h1>{{ page_title }}</h1><!-- 创建 `v-for` 并为 Vue 应用一个 `key`,该示例使用了 `slug` 和 `index` 的组合。 --><divv-for="(post,index) in posts":key="post.slug + '_' + index"><article class="media"><figure><!-- 使用 `:` 绑定结果 --><!-- 使用一组 `v-if`/`else` 判断它们是否是 `featured_image` --><imgv-if="post.featured_image"alt=""><imgv-elsesrc="http://via.placeholder.com/250x250"alt=""></figure><h2>{{ post.title }}</h2><p>{{ post.summary }}</p></article></router-link></div></div></template>
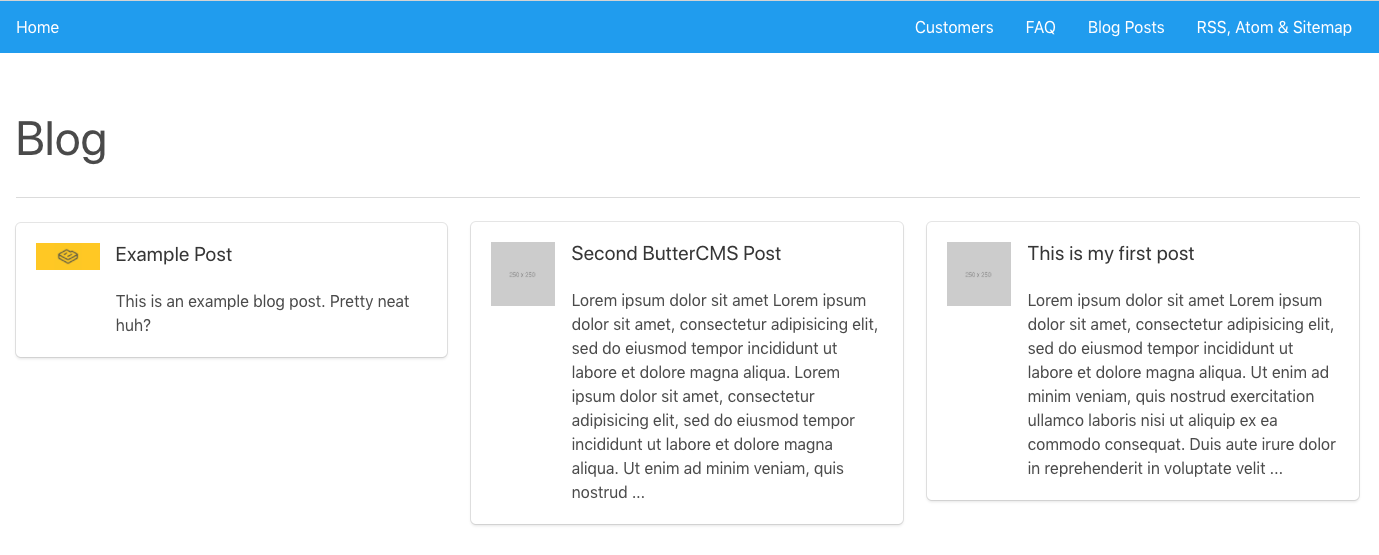
这是它的样子 (注意为了快速设置样式,我们从 添加了 CSS):
现在创建 components/BlogPost.vue 用来展示你的单篇博文页面。
<script>
  import { butter } from '@/buttercms'
  export default {
    name: 'blog-post',
    data() {
      return {
        post: {}
      }
    },
    methods: {
      getPost() {
        butter.post.retrieve(this.$route.params.slug)
          .then(res => {
            this.post = res.data
          }).catch(res => {
            console.log(res)
          })
      }
    },
    created() {
      this.getPost()
    }
  }
</script>

<template>
  <div id="blog-post">
    <h1>{{ post.data.title }}</h1>
    <h4>{{ post.data.author.first_name }} {{ post.data.author.last_name }}</h4>
    <div v-html="post.data.body"></div>

    <router-link
      v-if="post.meta.previous_post"
      :to="/blog/ + post.meta.previous_post.slug"
      class="button"
    >
      {{ post.meta.previous_post.title }}
    </router-link>
    <router-link
      v-if="post.meta.next_post"
      :to="/blog/ + post.meta.next_post.slug"
      class="button"
    >
      {{ post.meta.next_post.title }}
    </router-link>
  </div>
</template>
预览效果如下:
现在我们的应用已经拉取了所有博文并且可以导航到每个独立的博文。但上一篇博文/下一篇博文的链接还不工作。
需要注意的一点是在通过参数控制路由时,比如当用户从 /blog/foo 导航至 /blog/bar 时,我们复用了相同的组件实例。因为这两个路由渲染了相同的组件,所以比销毁老实例再创建新实例的效率更高。
注意,用这种方式使用组件意味着这个组件的生命周期钩子将不会被调用。请移步 Vue Router 的文档了解动态路由匹配。
为了解决这个问题,我们需要匹配 $route 对象并在路由发生变化的时候调用 getPost()。
更新 components/BlogPost.vue 中的 <script> 部分:
现在你的应用就有了可工作的博客,你可以在 ButterCMS 仪表盘便捷地更新它。
分类、标签和作者
使用 Butter 关于分类、标签和作者的 API 来设置和过滤你的博客。
你可以移步到 ButterCMS API 参考文档来进一步了解这些对象:
methods: {
  // ...
  getCategories() {
    butter.category.list()
      .then(res => {
        console.log('List of Categories:')
        console.log(res.data.data)
      })
  },
  getPostsByCategory() {
    butter.category.retrieve('example-category', {
        include: 'recent_posts'
      })
      .then(res => {
        console.log('Posts with specific category:')
        console.log(res)
      })
  }
},
created() {
  // ...
  this.getCategories()
  this.getPostsByCategory()
}
总结
差不多就是这些了!现在你已经在自己的应用中拥有了一个可以正常工作的 CMS 博客。我们希望这份教程可以帮助你,使你的 Vue.js 开发体验更有乐趣 :)

