
Xenko for Unity® developers
The Xenko editor is Game Studio. This is the equivalent of the Unity® Editor.
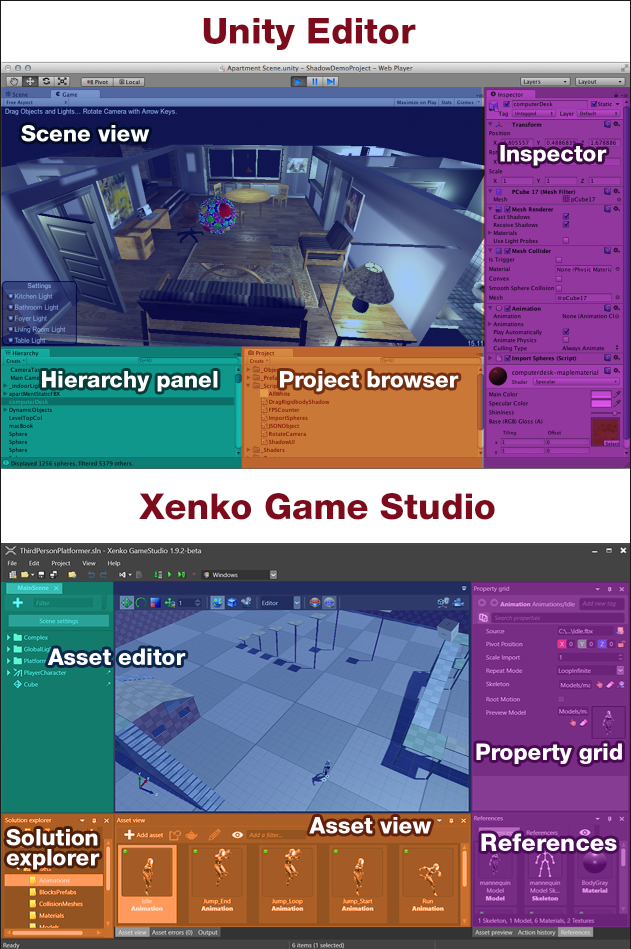
Unity® screenshot taken from Calling a web-service from a Unity3D scene by Kean Walmsley.
You can customize the Game Studio layout by dragging tabs, similar to Visual Studio.
For more information about Game Studio, see the page.
Terminology
Unity® and Xenko use mostly common terms, with a few differences:
Folders and files
Like Unity®, Xenko projects are stored in a directory that contains:
the project solution file, which you can open with Game Studio or any IDE such as Visual Studio
a MyGame.Game folder with project source files, dependencies, resources, configurations, and binaries
Assets contains the asset files which represent elements in your game.
Bin contains the compiled binaries and data. Xenko creates the folder when you build the project, with a subdirectory for each platform.
MyPackage.Game contains your source code.
MyPackage.Platform contains additional code for the platforms your project supports. Game Studio creates folders for each platform (eg MyPackage.Windows, MyPackage.Linux, etc). These folders are usually small, and only contain the entry point of the program.
obj contains cached files. Game Studio creates this folder when you build your project. To force a complete asset and code rebuild, delete this folder and build the project again.
Resources is a suggested location for files such as images and audio files used by your assets.
Xenko and Unity® differ in the following ways:
Xenko doesn't automatically copy resource files to your project folder when you import them into assets. You have to do this yourself. We recommend you save them in the Resources folder.
Xenko doesn't require resource files and asset files to be in the same folder. You can save resource files in the Assets folder if you want, but instead we recommend you save them in the Resources folder. This makes sharing your project via version control easier.
For more information about project structure in Xenko, including advice about how to organize and share your files, see the Project structure page.
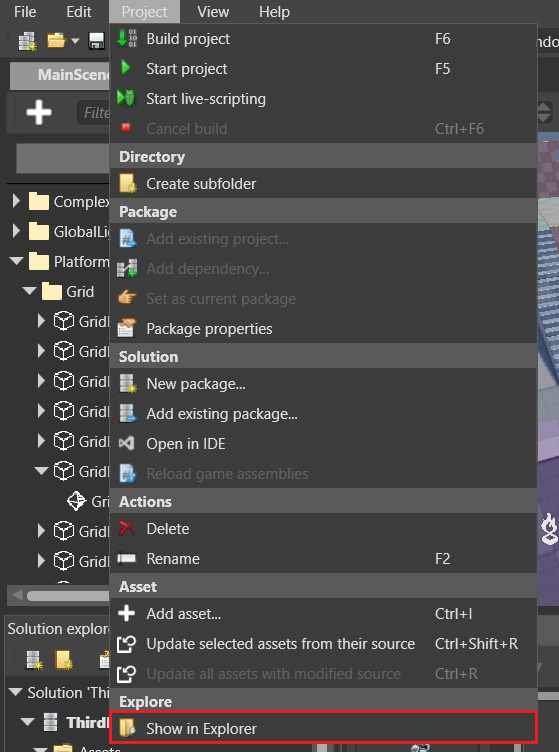
You can open the project directory from Project > Show in explorer in Game Studio.
Game settings
Unity® saves global settings in separate assets (ie Graphics Settings, Quality Settings, Audio Manager, and so on).
Xenko saves global settings in a single asset, the Game Settings asset. You can configure:
- The default scene
- Rendering settings
- Editor settings
- Texture settings
- Physics settings
- OverridesTo use the Game Settings asset, in the Asset View, select GameSettings and view its properties in the Property Grid.
Scenes
Like Unity®, in Xenko you place all objects in a scene. Game Studio stores scenes as separate .xkscene assets in your project directory.
Set the default scene
You can have multiple scenes in your project. Xenko loads the default scene at runtime.
To set the default scene:
- In the GameSettings properties, next to Default Scene, click
 (Select an asset).
The Select an asset window opens.
- Select the default scene and click OK.
For more information about scenes, see .
In Unity®, objects in the scene are called GameObjects. In Xenko, they're called entities.
Like GameObjects, entities are carriers for components such as transform components, model components, audio components, and so on. If you're used to working with GameObjects in Unity®, you should have no problem using entities in Game Studio.
Entity components
In Xenko, you add components to entities just like you add components to GameObjects in Unity®.
To add a component to entity in Game Studio:
- Select the entity you want to add the component to.
- In the Property Grid (on the right by default), click Add component and select the component from the drop-down list.
Transform component
Like GameObjects in Unity®, each entity in Xenko has a Transform component which sets its position, rotation, and scale in the world.
Even empty entities have a Transform component, because every entity in the scene must have a position.
In Xenko, Transform components contain a LocalMatrix and a WorldMatrix that are updated in every Update frame. If you need to force an update sooner than that you can use TranformComponent.UpdateLocalMatrix(), Transform.UpdateWorldMatrix(), or Transform.UpdateLocalFromWorld() to do so, depending on how you need to update the matrix.
Local Position/Rotation/Scale
Xenko uses position, rotation, and scale to refer to the local position, rotation and scale.
World Position/Rotation/Scale
In comparison to Unity, many of the Transform component's properties related to its location in the world have been moved to the .
Transform Directions
Unlike Unity, Xenko provides a Backward, Left, and Down property.
Assets
In Unity®, you select an asset in the project browser and edit its properties in the Inspector tab.
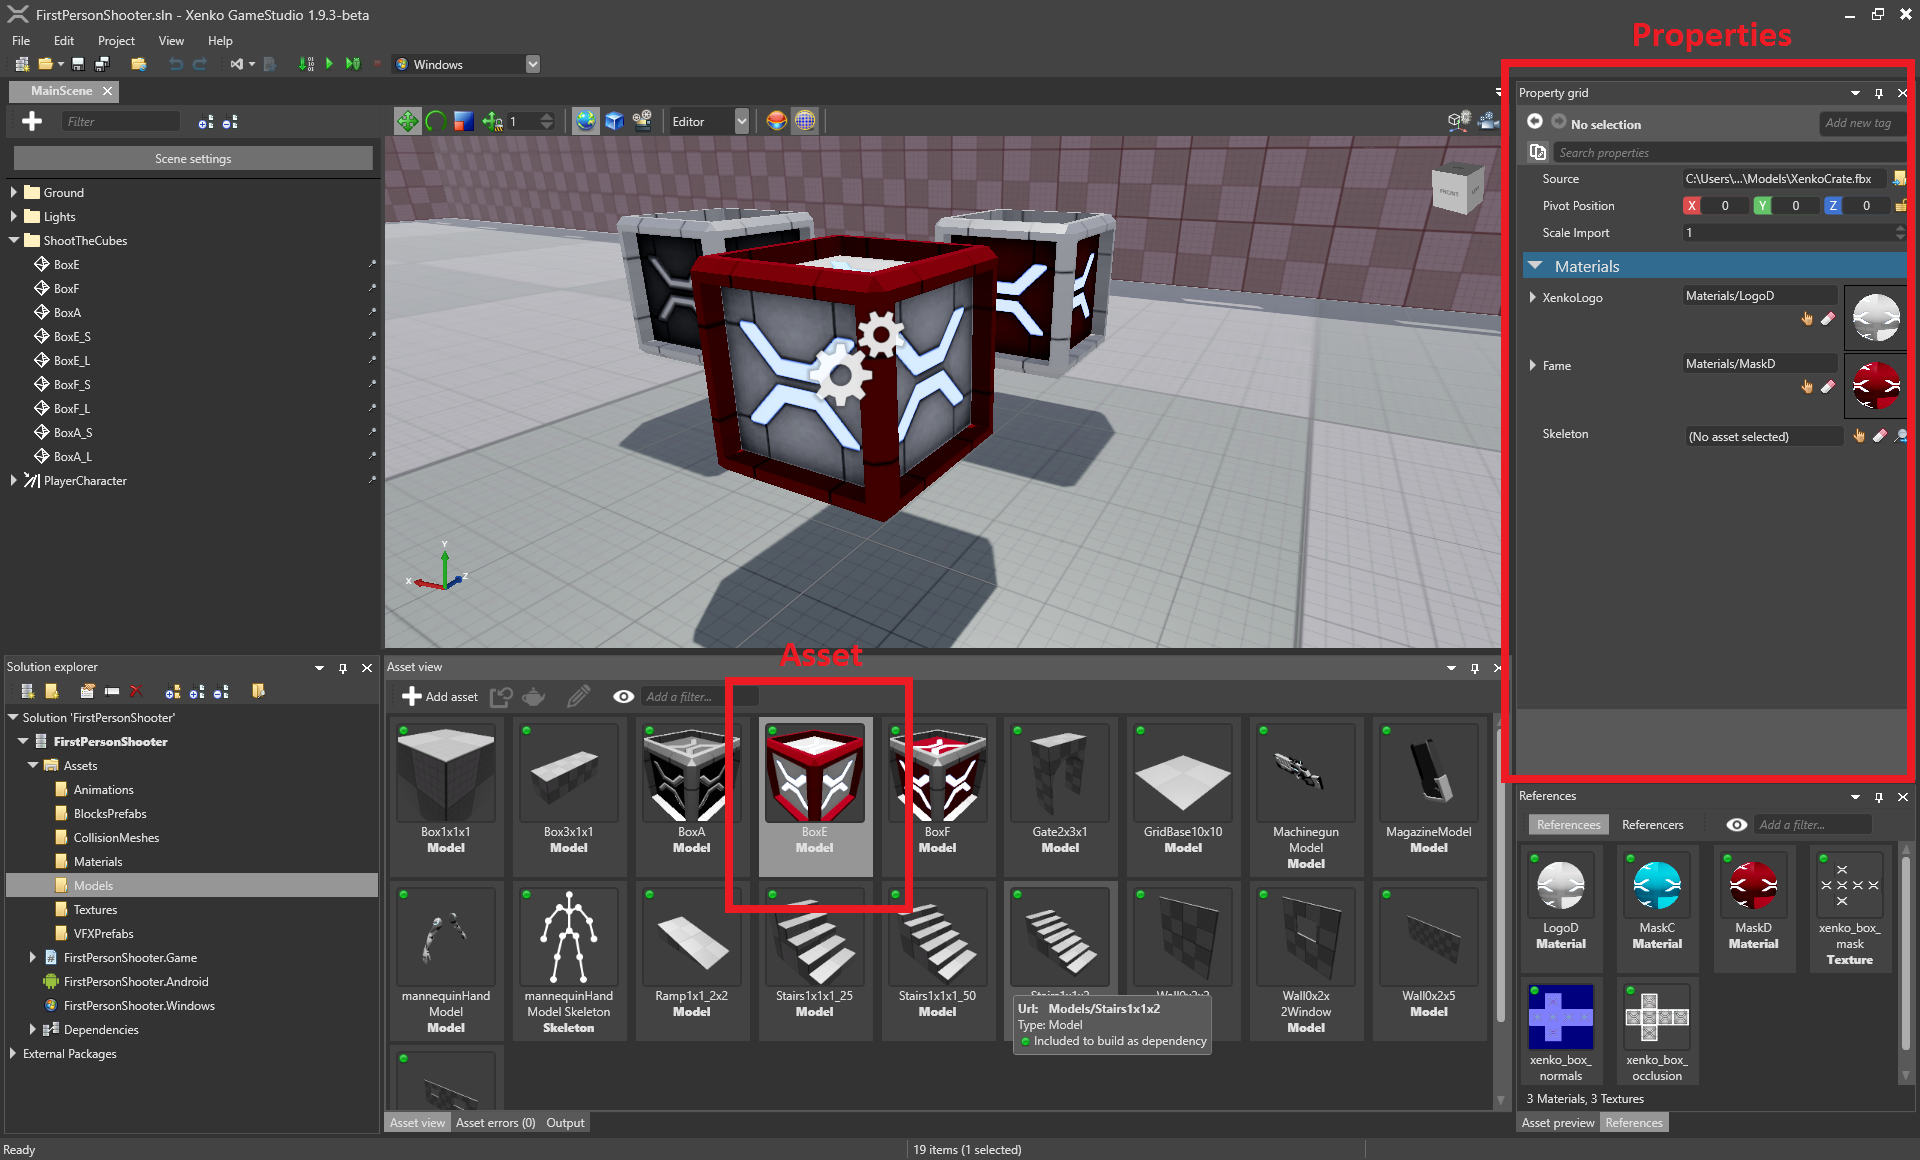
Xenko is similar. You select an asset in the Asset View and edit its properties in the Property Grid.
For certain types of asset, Game Studio also has dedicated editors:
- prefabs
- scenes
- sprite sheets
- UI pages
- UI libraries
scriptsTo open the dedicated editor for these types of asset:
double-click the asset, or
- right-click the asset and select Edit asset, or
- select the asset and type Ctrl + EnterThe editor opens in a new tab. You can arrange the tabs how you like, or float them as separate windows, just like tabs in web browsers.
Note
When you modify resource files outside Game Studio, the corresponding assets update automatically in Game Studio.
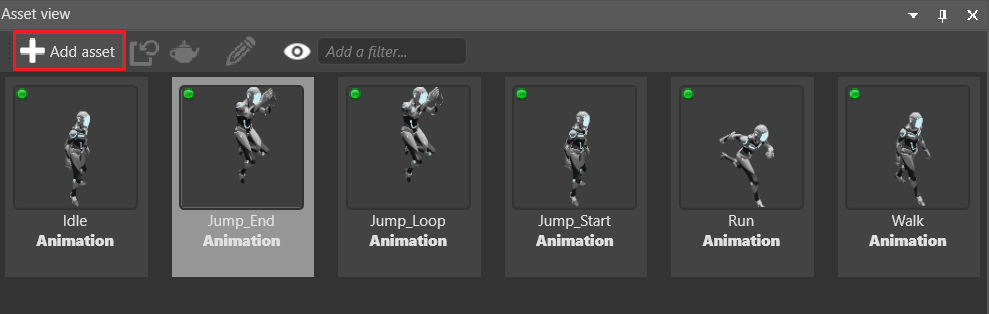
Import assets
To import an asset, drag it from Explorer to the Asset View. You can also click an Add asset button, navigate to the desired file and specify the type of asset you want to import.
As soon as you add an asset to your project, you can edit its properties in the Property Grid.
Note
Unlike Unity®, Xenko doesn't automatically copy resource files to the project directory when you import them to projects.
Supported file formats
Like Unity®, Xenko supports file formats including:
For more information about assets, see Assets.
Note
- Xenko currently doesn't support movie files.
Prefabs
Like Unity®, Xenko uses prefabs. Prefabs are "master" versions of objects that you can reuse wherever you need. When you change a prefab, every instance of the prefab changes too.
Unlike Unity®, in Xenko, you can also add prefabs to other prefabs. These are called nested prefabs. If you modify a nested prefab, all the dependent prefabs inherit the change automatically.
For example, imagine you create a Vehicle prefab with acceleration, braking, steering, and so on. Then you nest the Vehicle prefab inside prefabs of different types of vehicles: a taxi, bus,truck, etc. If you adjust a property in the Vehicle prefab, the changes are inherited by all other prefabs. For example, if you increase the Acceleration property in the Vehicle prefab, the acceleration property in the taxi, bus and truck prefabs also increase.
To do this in Unity®, you have to create separate prefabs for each vehicle type and modify their acceleration parameters one by one.
For more information about using prefabs in Xenko, see .
Archetypes
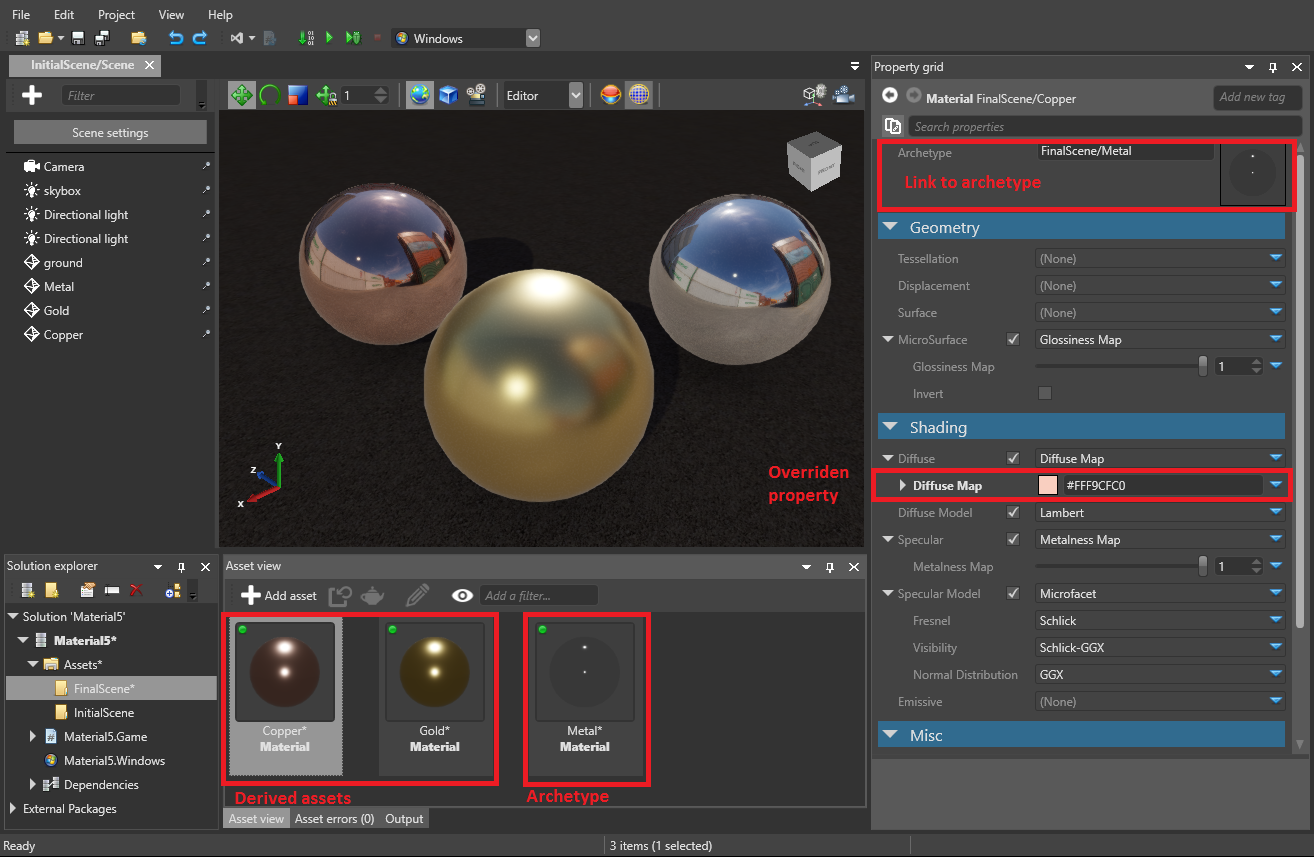
Archetypes are master assets that control the properties of assets you derive from them. Derived assets are useful when you want to create a "remixed" version of an asset. This is similar to prefabs.
For example, imagine we have three sphere entities that share a material asset named Metal. Now imagine we want to change the color of only one sphere, but keep its other properties the same. We could duplicate the material asset, change its color, and then apply the new asset to only one sphere. But if we later want to change a different property across all the spheres, we have to modify both assets. This is time-consuming and leaves room for mistakes.
The better approach is to derive a new asset from the archetype. The derived asset inherits properties from the archetype and lets you override individual properties where you need them. For example, we can derive the sphere's material asset and override its color. Then, if we change the gloss of the archetype, the gloss of all three spheres changes.
You can derive an asset from an archetype, then in turn derive another asset from that derived asset. This way you can create different layers of assets to keep your project organized:
For more information about archetypes, see Archetypes.
Xenko supports a variety of inputs. The code samples below demonstrate the difference in input code between Xenko and Unity®.
For more information about Input in Xenko, see .
Unity
void Update(){// true for one frame in which the space bar was pressedif(Input.GetKeyDown(KeyCode.Space)){// Do something.}// true while this joystick button is downif (Input.GetButton("joystick button 0")){// Do something.}float Horiz = Input.GetAxis("Horizontal");float Vert = Input.GetAxis("Vertical");//Do something else.}
Physics
Just like Unity®, Xenko has three types of collider:
- static colliders
- rigidbodies
- charactersThey're controlled from scripts in slightly different ways.
Kinematic rigidbodies
Unity®
public Rigidbody rigidBody;void Start(){rigidBody = GetComponent<Rigidbody>();}void EnableRagdoll(){rigidBody.isKinematic = false;rigidBody.detectCollisions = true;}void DisableRagdoll(){rigidBody.isKinematic = true;rigidBody.detectCollisions = false;}
Xenko
public class KinematicX : SyncScript{public RigidbodyComponent component;public override void Start(){// Initialization of the script.component = Entity.Get<RigidbodyComponent>();public override void Update(){}public void EnableRagdoll(){component.IsKinematic = false;component.ProcessCollisions = true;}public void DisableRagdoll(){component.IsKinematic = true;component.ProcessCollisions = false;}}
For more information about rigidbodies in Xenko, see Rigidbodies.
Triggers
Unity®
// When game object collides with the trigger.void OnTriggerEnter(Collider Other){Other.transform.localScale = new Vector3(2.0f, 2.0f, 2.0f);}//When game object exits collider space.void OnTriggerExit(Collider Other){Other.transform.localScale = new Vector3(1.0f, 1.0f, 1.0f);}
Xenko
var trigger = Entity.Get<PhysicsComponent>();trigger.ProcessCollisions = true;// Start state machine.while (Game.IsRunning){// 1. Wait for an entity to collide with the trigger.Collision firstCollision = await trigger.NewCollision();PhysicsComponent otherCollider = trigger == firstCollision.ColliderA? firstCollision.ColliderB: firstCollision.ColliderA;otherCollider.Entity.Transform.Scale = new Vector3(2.0f, 2.0f, 2.0f);// 2. Wait for the entity to exit the trigger.Collision collision;do{collision = await trigger.CollisionEnded();}while (collision != firstCollision);otherCollider.Entity.Transform.Scale = new Vector3(1.0f, 1.0f, 1.0f);}
Unity®
Collider FindGOCameraIsLookingAt(){int distance = 50;// Cast a ray and set it to the mouse cursor position in the gameRay ray = Camera.main.ScreenPointToRay(Input.mousePosition);RaycastHit hit;{// Draw invisible ray cast/vectorDebug.DrawLine(ray.origin, hit.point);// Log hit area to the consoleDebug.Log(hit.point);return hit.collider;}return null;}
Xenko
For more information about Raycasting in Xenko, see .
Scripts
Xenko saves scripts in a subfolder in the MyGame.Game folder in the project directory.
To open a script in the Game Studio script editor, double-click it in the Asset View. The script editor has syntax highlighting, auto-completion, and live diagnostics.
You can also edit scripts in other IDEs, such as Visual Studio. When you edit a script in an external IDE, Xenko reloads them automatically.
If you install the Visual Studio plug-in during the Xenko installation, you can open your project in Visual Studio from Game Studio. To do this, in the Game Studio toolbar, click Open in IDE.

Alternatively, right-click the script in the Asset View and click Open asset file:
Event functions (Start, Update, Execute, etc)
In Unity®, you work with MonoBehaviours with Start(), Update(), and other methods.
Instead of MonoBehaviours, Xenko has three types of scripts: SyncScript, AsyncScript, StartupScript. For more information, see Types of script.
Unity® MonoBehaviour
public class BasicMethods : MonoBehaviour{void Start() { }void OnDestroy() { }void Update() { }}
Xenko SyncScript
public class BasicMethods : SyncScript{public override void Start() { }public override void Cancel() { }}
Xenko AsyncScript
public class BasicMethods : AsyncScript{// Declared public member fields and properties that will appear in the game studiopublic override async Task Execute(){while(Game.IsRunning){// Do stuff every new frameawait Script.NextFrame();}}public override void Cancel(){// Cleanup of the script}}
Xenko StartupScript
public class BasicMethods : StartupScript{// Declared public member fields and properties that will appear in the game studiopublic override void Start(){// Initialization of the script}public override void Cancel(){// Cleanup of the script}}
Script components
Like Unity®, in Xenko, you attach scripts to entities by adding them as script components.
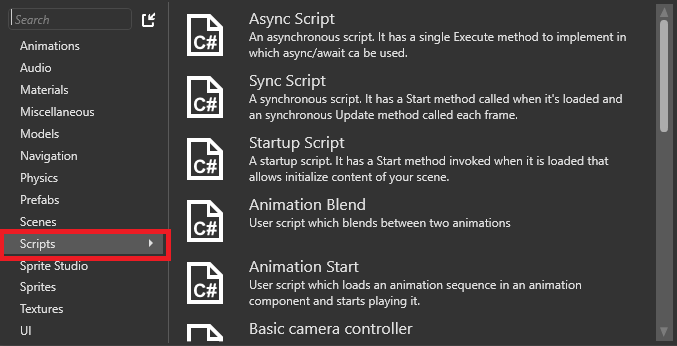
Create a script
To create a script, click Add asset button and select Scripts.
In Unity®, when you create a MonoBehaviour script, it has two base functions: Start() and Update(). Xenko has a that works similarly. Like MonoBehaviour, SyncScript has two methods:
is called when it the script is loaded.
Update() is called every update.
Unlike MonoBehaviour, you have to use method in every SyncScript, or your code won't work properly.
If you want your script to be a startup or asynchronous, use the corresponding script types:
: this script has a single Start() method. It initializes the scene and its content at startup.
: an asynchronous script with a single method Execute() and you can use async/await inside that method. Asynchronous scripts aren't loaded one by one like synchronous scripts. Instead, they're all loaded in parallel.
Unlike Unity®, after you create a script, you have to reload the assemblies manually. To do this, click Reload assemblies in the Game Studio toolbar.
Add scripts to entities
- In the Entity Tree (on the left by default), or in the scene, select the entity you want to add the script to.
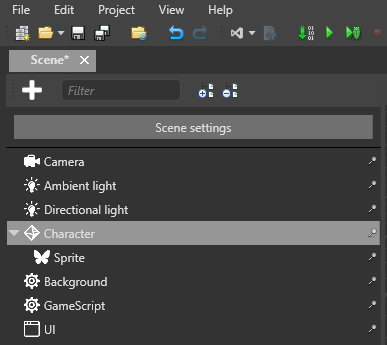
- In the Property Grid (on the right by default), click Add component and select the script you want to add.
In Unity®, script components are grouped under Components > Scripts. In Xenko, scripts are not grouped. Instead, Game Studio lists them alphabetically with other components.
For more information about adding scripts in Xenko, see .
Unity® and Xenko both use C#. However, scripting gameplay in Xenko is a little different from Unity®.
Instantiate Entity / GameObject
In Unity®, you use Instantiate to create new object instances. This function makes a copy of UnityEngine.Object and spawns it to the scene.
Unity®
public GameObject CarPrefab;public Vector3 SpawnPosition;public Quaternion SpawnRotation;void Start(){GameObject NewGO = (GameObject)Instantiate(CarPrefab, SpawnPosition, SpawnRotation);NewGO.name = "NewGameObject1";}
Xenko
In Xenko, you can instantiate Entities similarly to Unity® GameObjects:
// Declared public member fields and properties displayed in the Game Studio Property Grid.public Prefab CarPrefab;public Vector3 SpawnPosition;public Quaternion SpawnRotation;public override void Start(){// Initialization of the script.List<Entity> car = CarPrefab.Instantiate();SceneSystem.SceneInstance.RootScene.Entities.AddRange(car);car[0].Transform.Position = SpawnPosition;car[0].Transform.Rotation = SpawnRotation;car[0].Name = "MyNewEntity";}
Use default values
Each class in Unity® has certain default values. If you don't override these properties in the script, the default values will be used. This works the same in Xenko:
Unity®
Xenko
// Declared public member fields and properties displayed in the Game Studio Property Grid.public int NewProp = 30;public LightComponent MyLightComponent = null;public override void Start(){// Create the light component if we don't already have one.if (MyLightComponent == null){MyLightComponent = new LightComponent();MyLightComponent.Intensity = 3;Entity.Add(MyLightComponent);}}
Disable GameObject/entity
Unity®
MyGameObject.SetActive(false);
Xenko
Entity.EnableAll(false, true);
Access component from GameObject/entity
Unity®
Light lightComponent = GetComponent<Light>();
Xenko
LightComponent lightComponent = Entity.Get<LightComponent>();
Access GameObject/entity from component
Unity®
GameObject ParentGO = lightComponent.gameObject;
Xenko
Log output
To see the output, in the Game Studio toolbar, under View, enable Output.
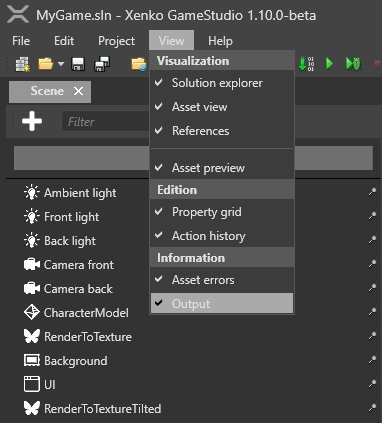
Game Studio displays in the Output tab (at the bottom of Game Studio by default).
To print to the Visual Studio output, use:
Note
To print debug messages, you have to run the game from Visual Studio, not Game Studio. There's no way to print to the Game Studio output window.

